
Retaining Wall and Site Work for a Lakefront Home in Bayview, Idaho
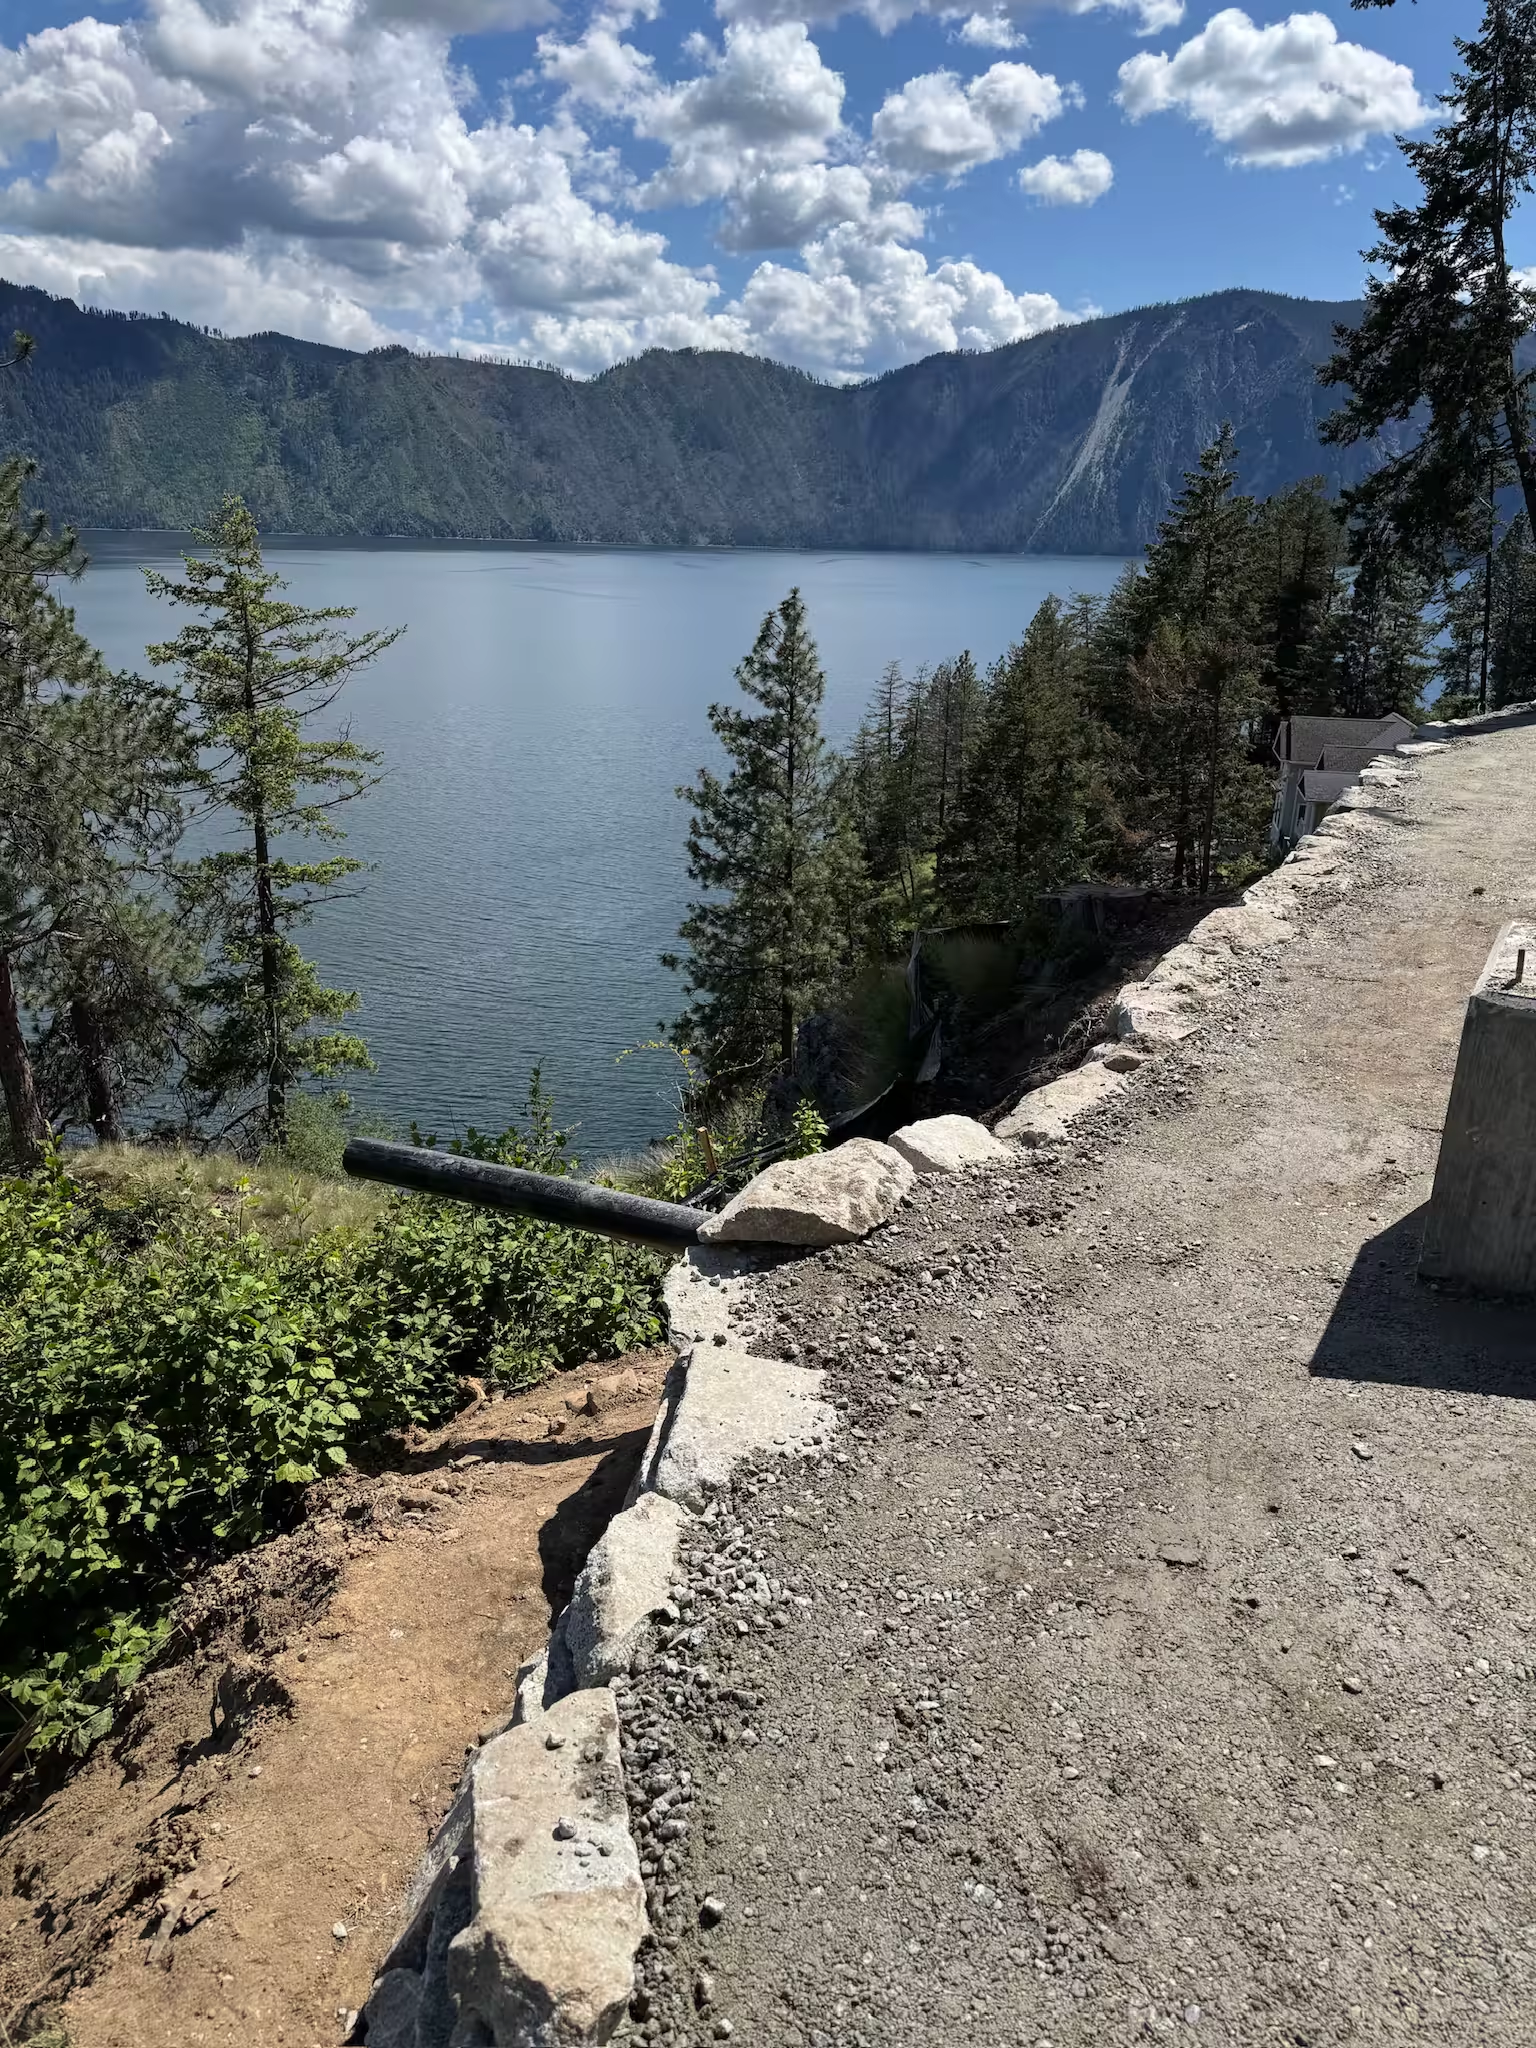
A general contractor building an addition onto a lakefront home on Cape Horn in Bayview needed the new foundation backfilled, the interior prepared for a concrete slab, and a retaining wall built along the downhill side.
The work area was only about 12 by 80 feet, tucked behind the house on a steep bluff with one narrow way in and out. Once work started, unsuitable material beneath the slab and changing wall requirements added more excavation and material to the original scope.
Working Behind a Lakefront Home on a Steep Bluff in Bayview, Idaho
The addition had already been excavated and the footings were in place when we arrived. Our job was to prepare the interior for the concrete slab and build a retaining wall to hold the backfill along the downhill side of the foundation.
Getting to the work area was the first issue. Materials had to be staged near the road, moved across the lawn, and carried down a steep slope through an existing hardscaped area.
Once excavation started, a few more conditions changed the original plan.
The Only Access Route Was Too Steep and Tight
The existing access path behind the house was too narrow and steep for the amount of material that needed to reach the addition.
Before the main work could begin, we widened the path and reduced the slope to create a workable access ramp down to the site.
The Existing Material Couldn’t Support the Slab Base
The original plan was to backfill the footings and prepare the interior for the concrete slab.
Once work began, we found that the native material beneath the slab area was unsuitable for the base. That material had to be removed and replaced before the interior could be brought up to grade.
The Retaining Wall Needed to Reach 4 to 5 Feet
The retaining wall was originally estimated at roughly 2 feet high and 60 feet long.
After excavating along the wall location, we needed to dig deeper to reach suitable material at the base. Combined with the steep downhill slope, that increased portions of the wall to roughly 4 to 5 feet high.
The Wall Had to Move Out to Make Room for a Walking Path
The homeowner also decided they wanted a walking path along the outside of the new addition.
To make room for it, the retaining wall needed to be moved a couple of feet farther away from the foundation before construction continued.
The Work
We spent about a week on site, working through the project from the only available access point behind the house.
The tight work area shaped the entire sequence. We first improved access, then rebuilt the interior slab base, prepared and built the retaining wall, and backfilled each section as we worked our way back out of the property.
Building Access to the Work Area
Before material could be brought down to the addition, the existing access path had to be widened and reworked.
The slope was reduced to create a better route from the roadside staging area to the back of the house. That gave the skid steer a workable path for moving gravel, boulders, and other material down to the job.
- ◆Widened the existing access so equipment and material could reach the narrow work area behind the house.
- ◆Reduced the access slope to create a more workable ramp down from the roadside staging area.
- ◆Established the material route used to move gravel and boulders across the property and down to the addition.


Rebuilding the Interior Slab Base
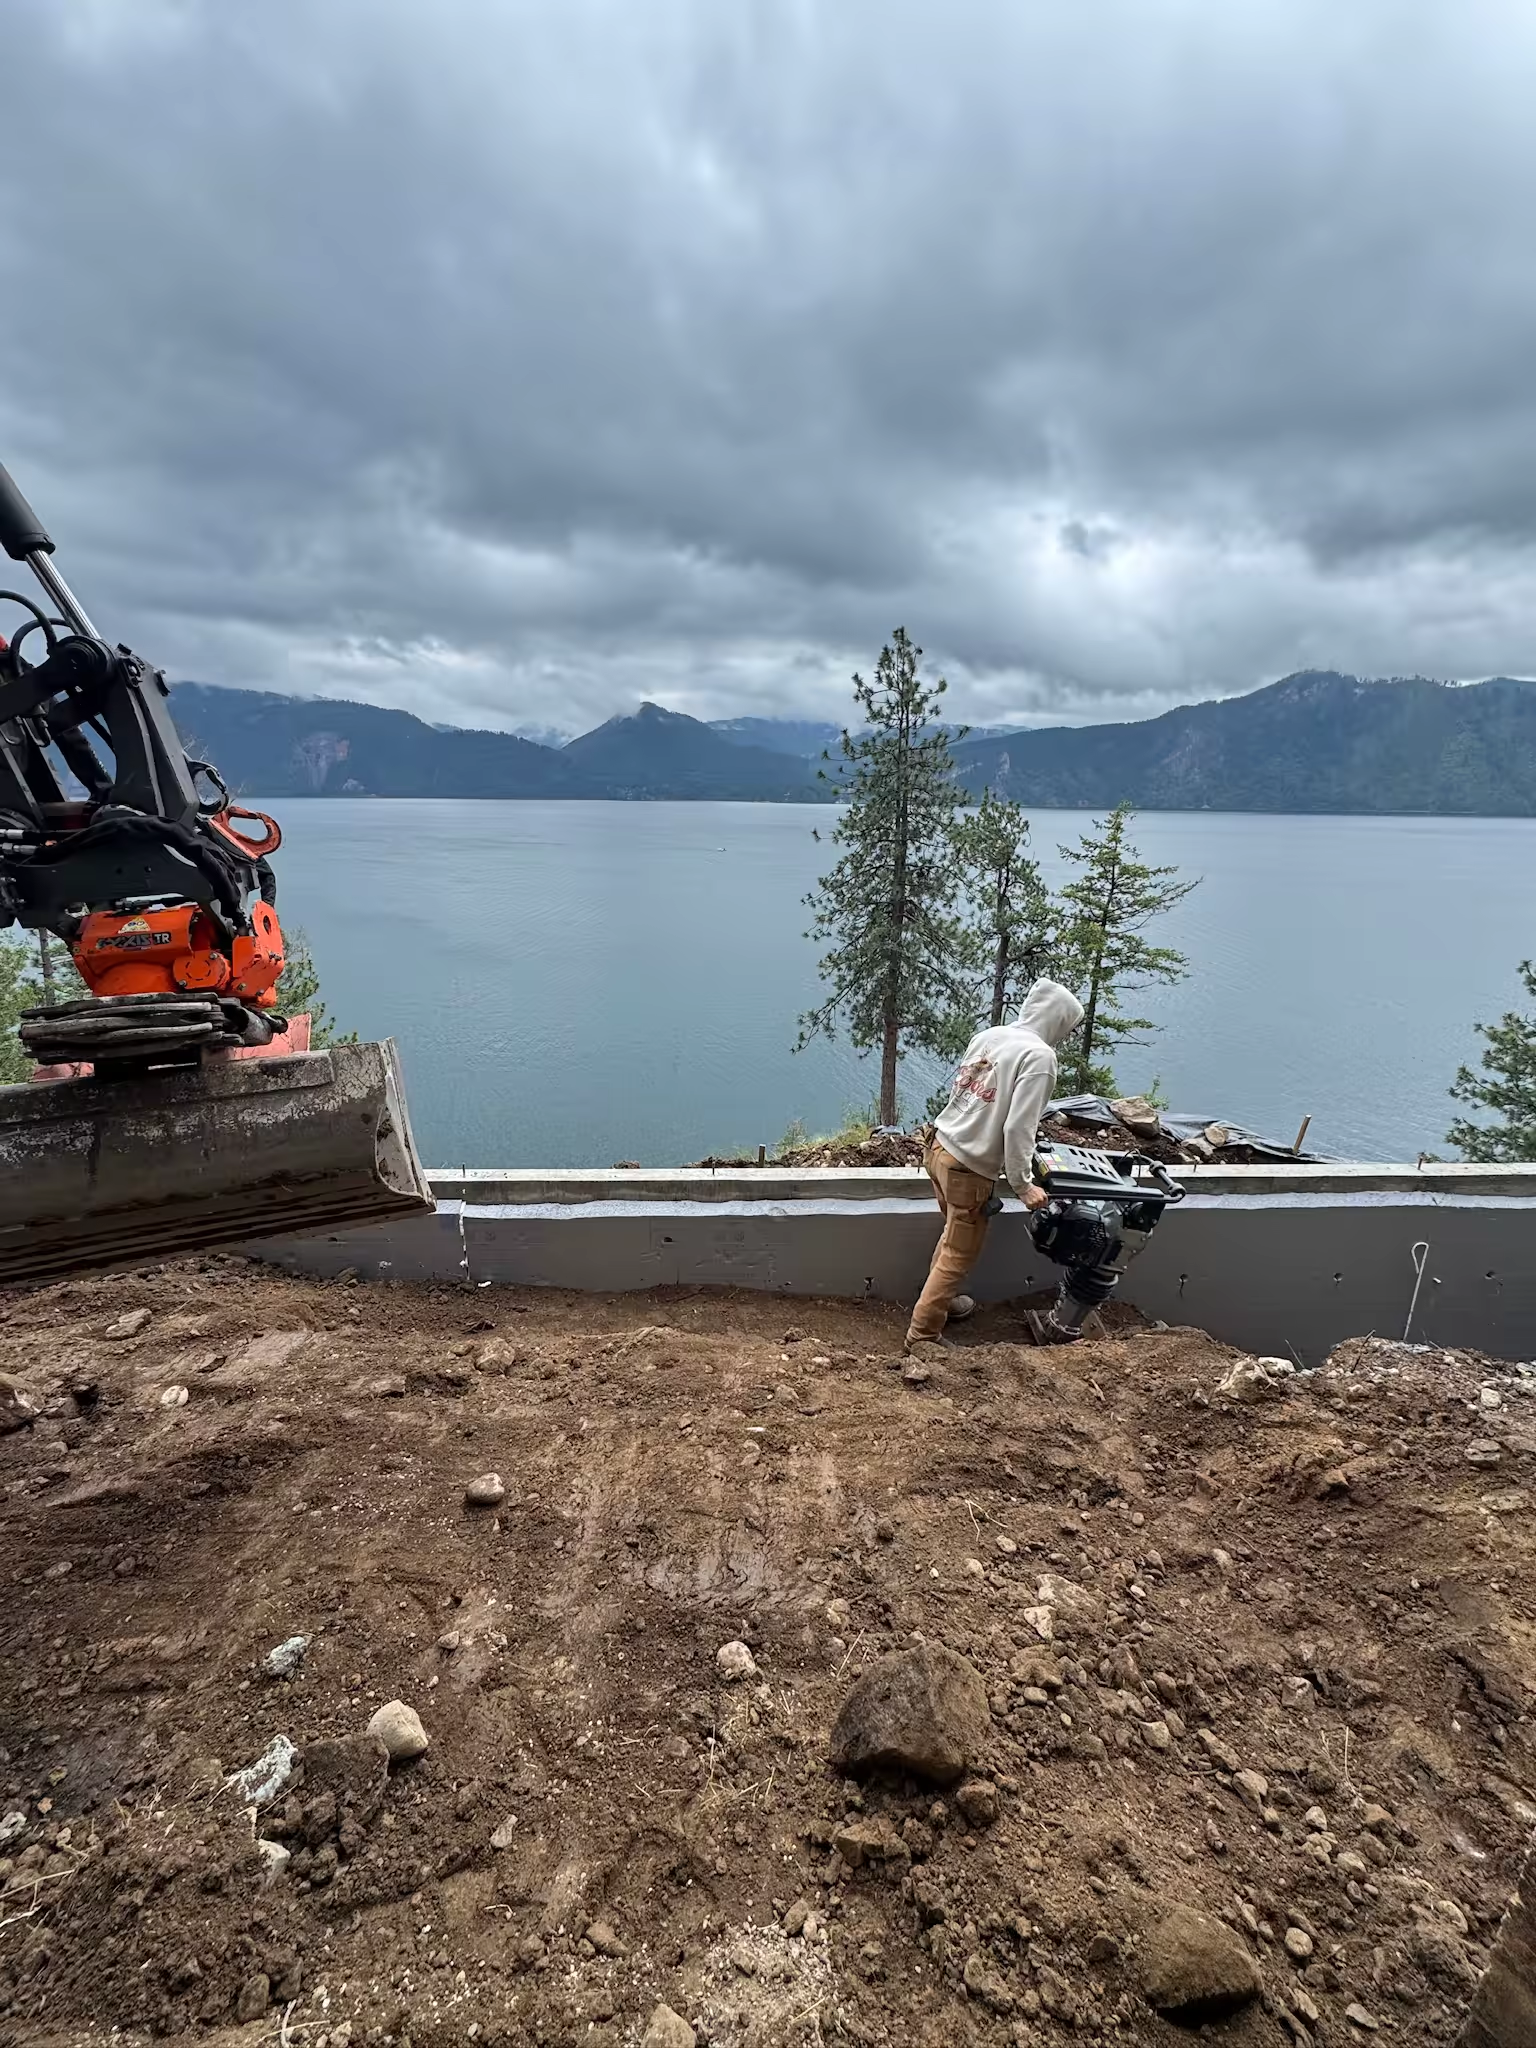
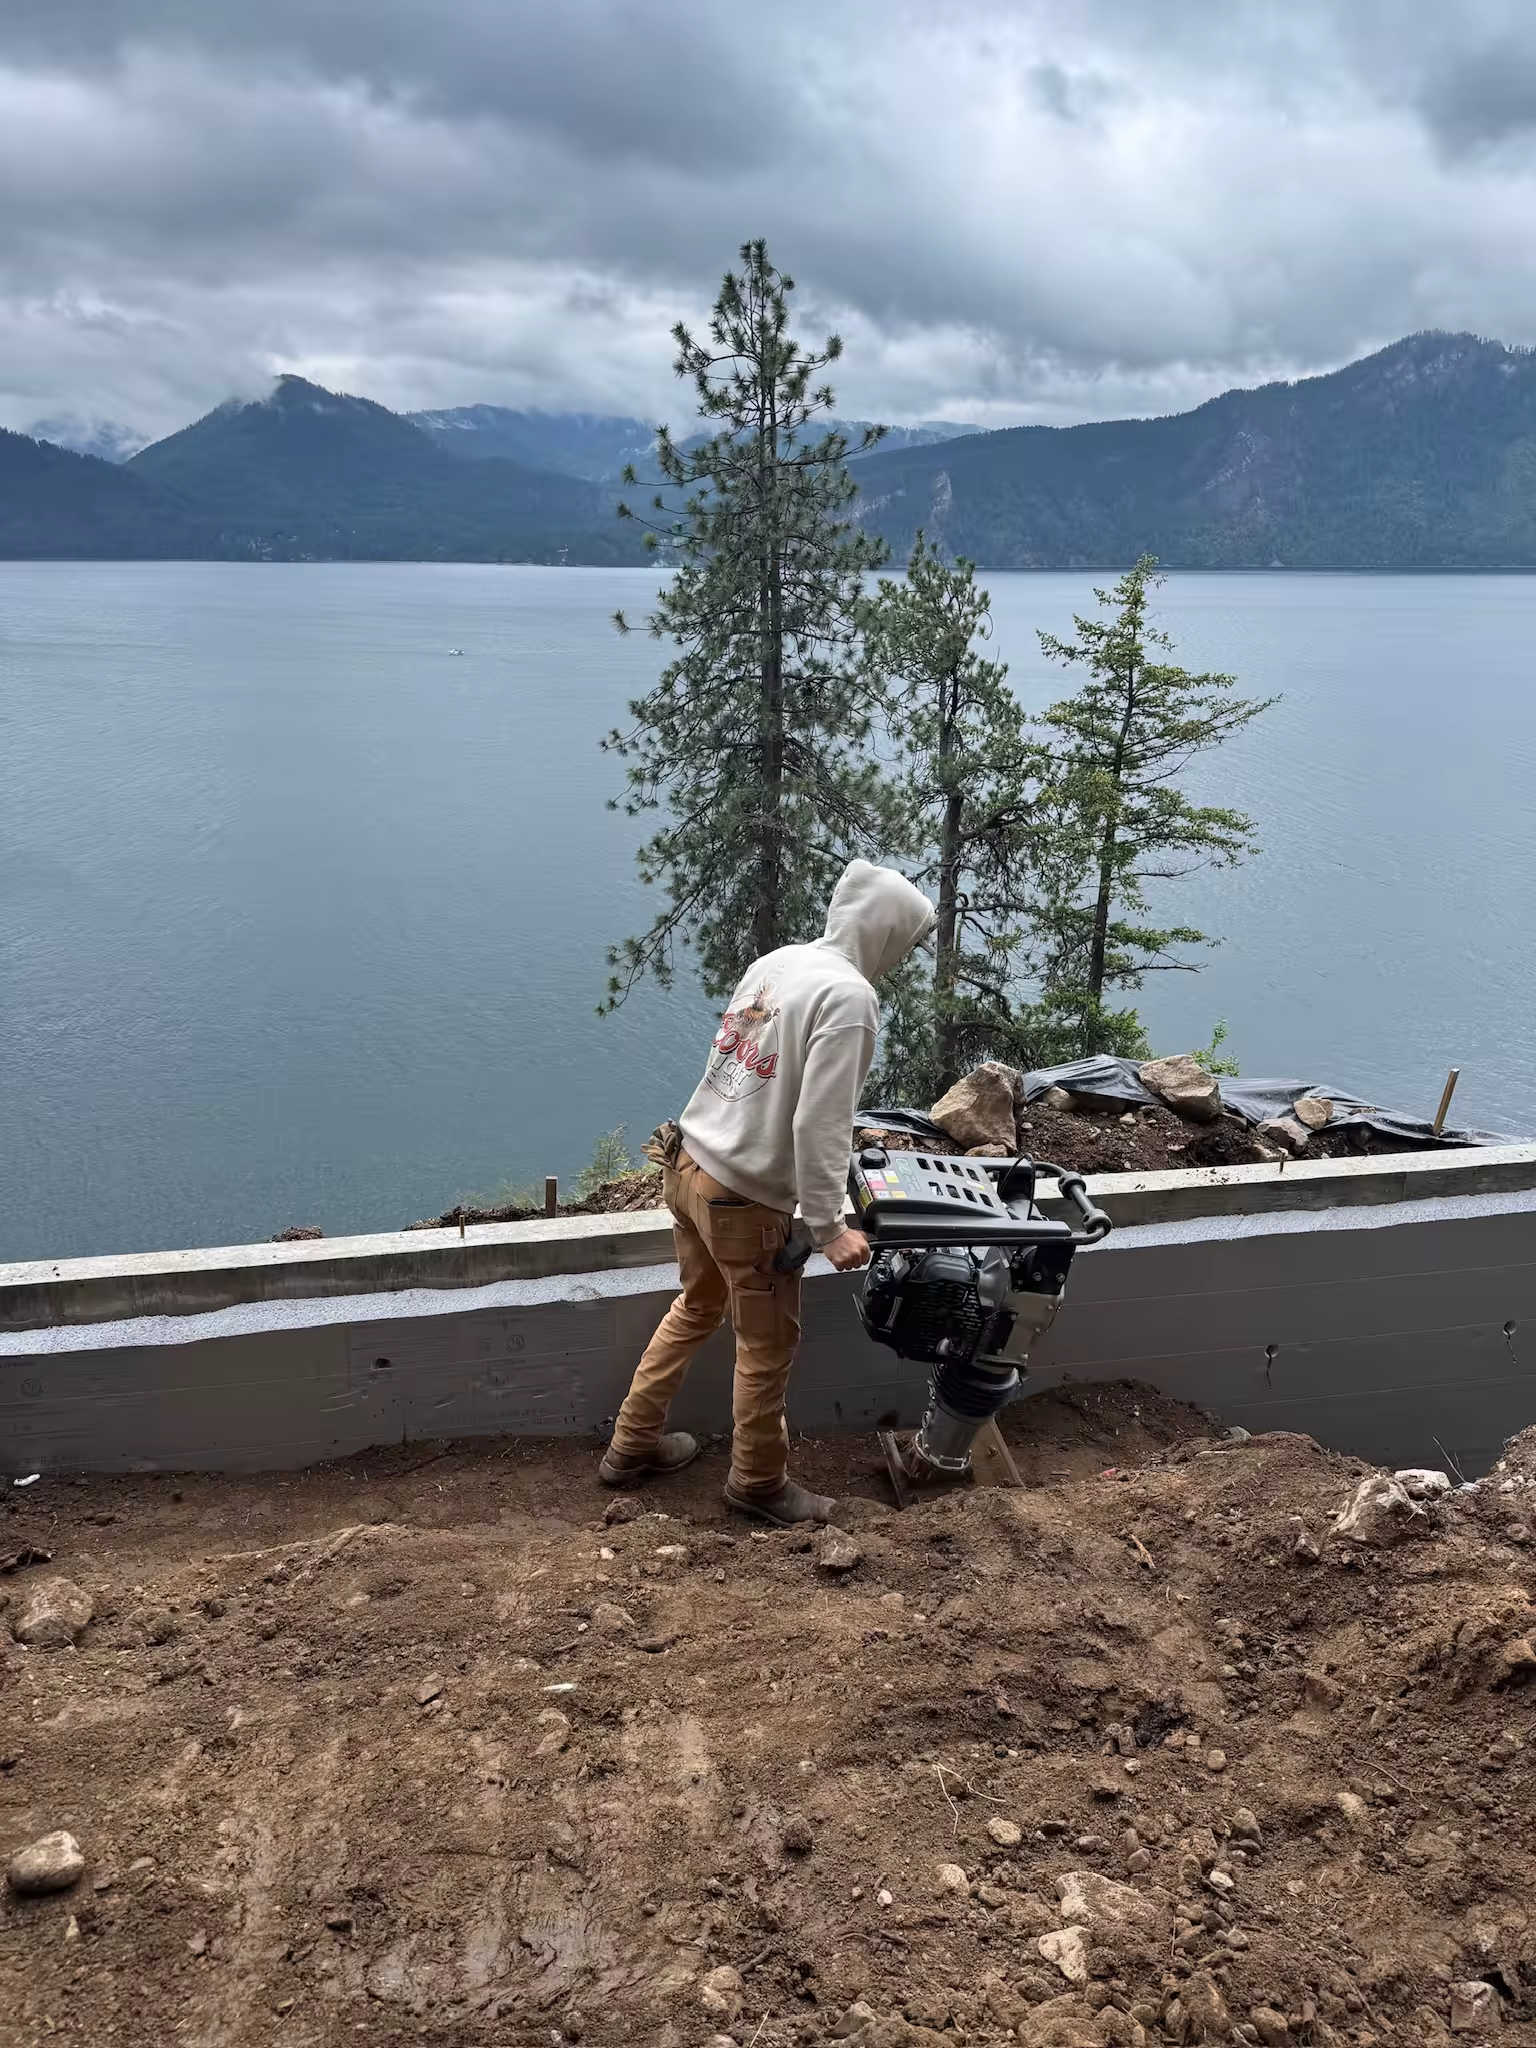
With access established, we started preparing the interior of the addition for the future concrete slab.
The native material that had been left inside the foundation was not suitable for the finished base. We removed it and brought in new material to build the interior back up to the required grade.
Working inside the narrow footprint left little room for equipment positioning, so the excavator’s tilt rotator was used to reach around corners without constantly repositioning the machine.
- ◆Removed unsuitable material from inside the foundation after determining it would not provide the base needed beneath the slab.
- ◆Imported new base material and brought the interior back up to the required grade for the concrete work that would follow.
- ◆Worked through tight corners with the tilt rotator, allowing the excavator to reach areas that offered very little room for machine movement.


Preparing the Retaining Wall Base
Once the interior base was finished, work moved to the retaining wall along the downhill side of the addition.
We excavated around the perimeter of the footings and removed the topsoil where the wall would sit. As we dug, it became clear that the wall needed to extend deeper to reach suitable base material.
That increased the planned wall height from roughly 2 feet to approximately 4 to 5 feet in some areas. The wall location was also moved farther from the foundation to leave room for the homeowner’s requested walking path.
- ◆Excavated the wall base along the downhill side of the addition and removed topsoil from the planned wall location.
- ◆Dug down to suitable material rather than placing the retaining wall over an unstable base.
- ◆Adjusted the wall layout to accommodate the increased height and create room for a walking path beside the addition.


Building the Retaining Wall
The retaining wall had to be built around the site’s single access point.
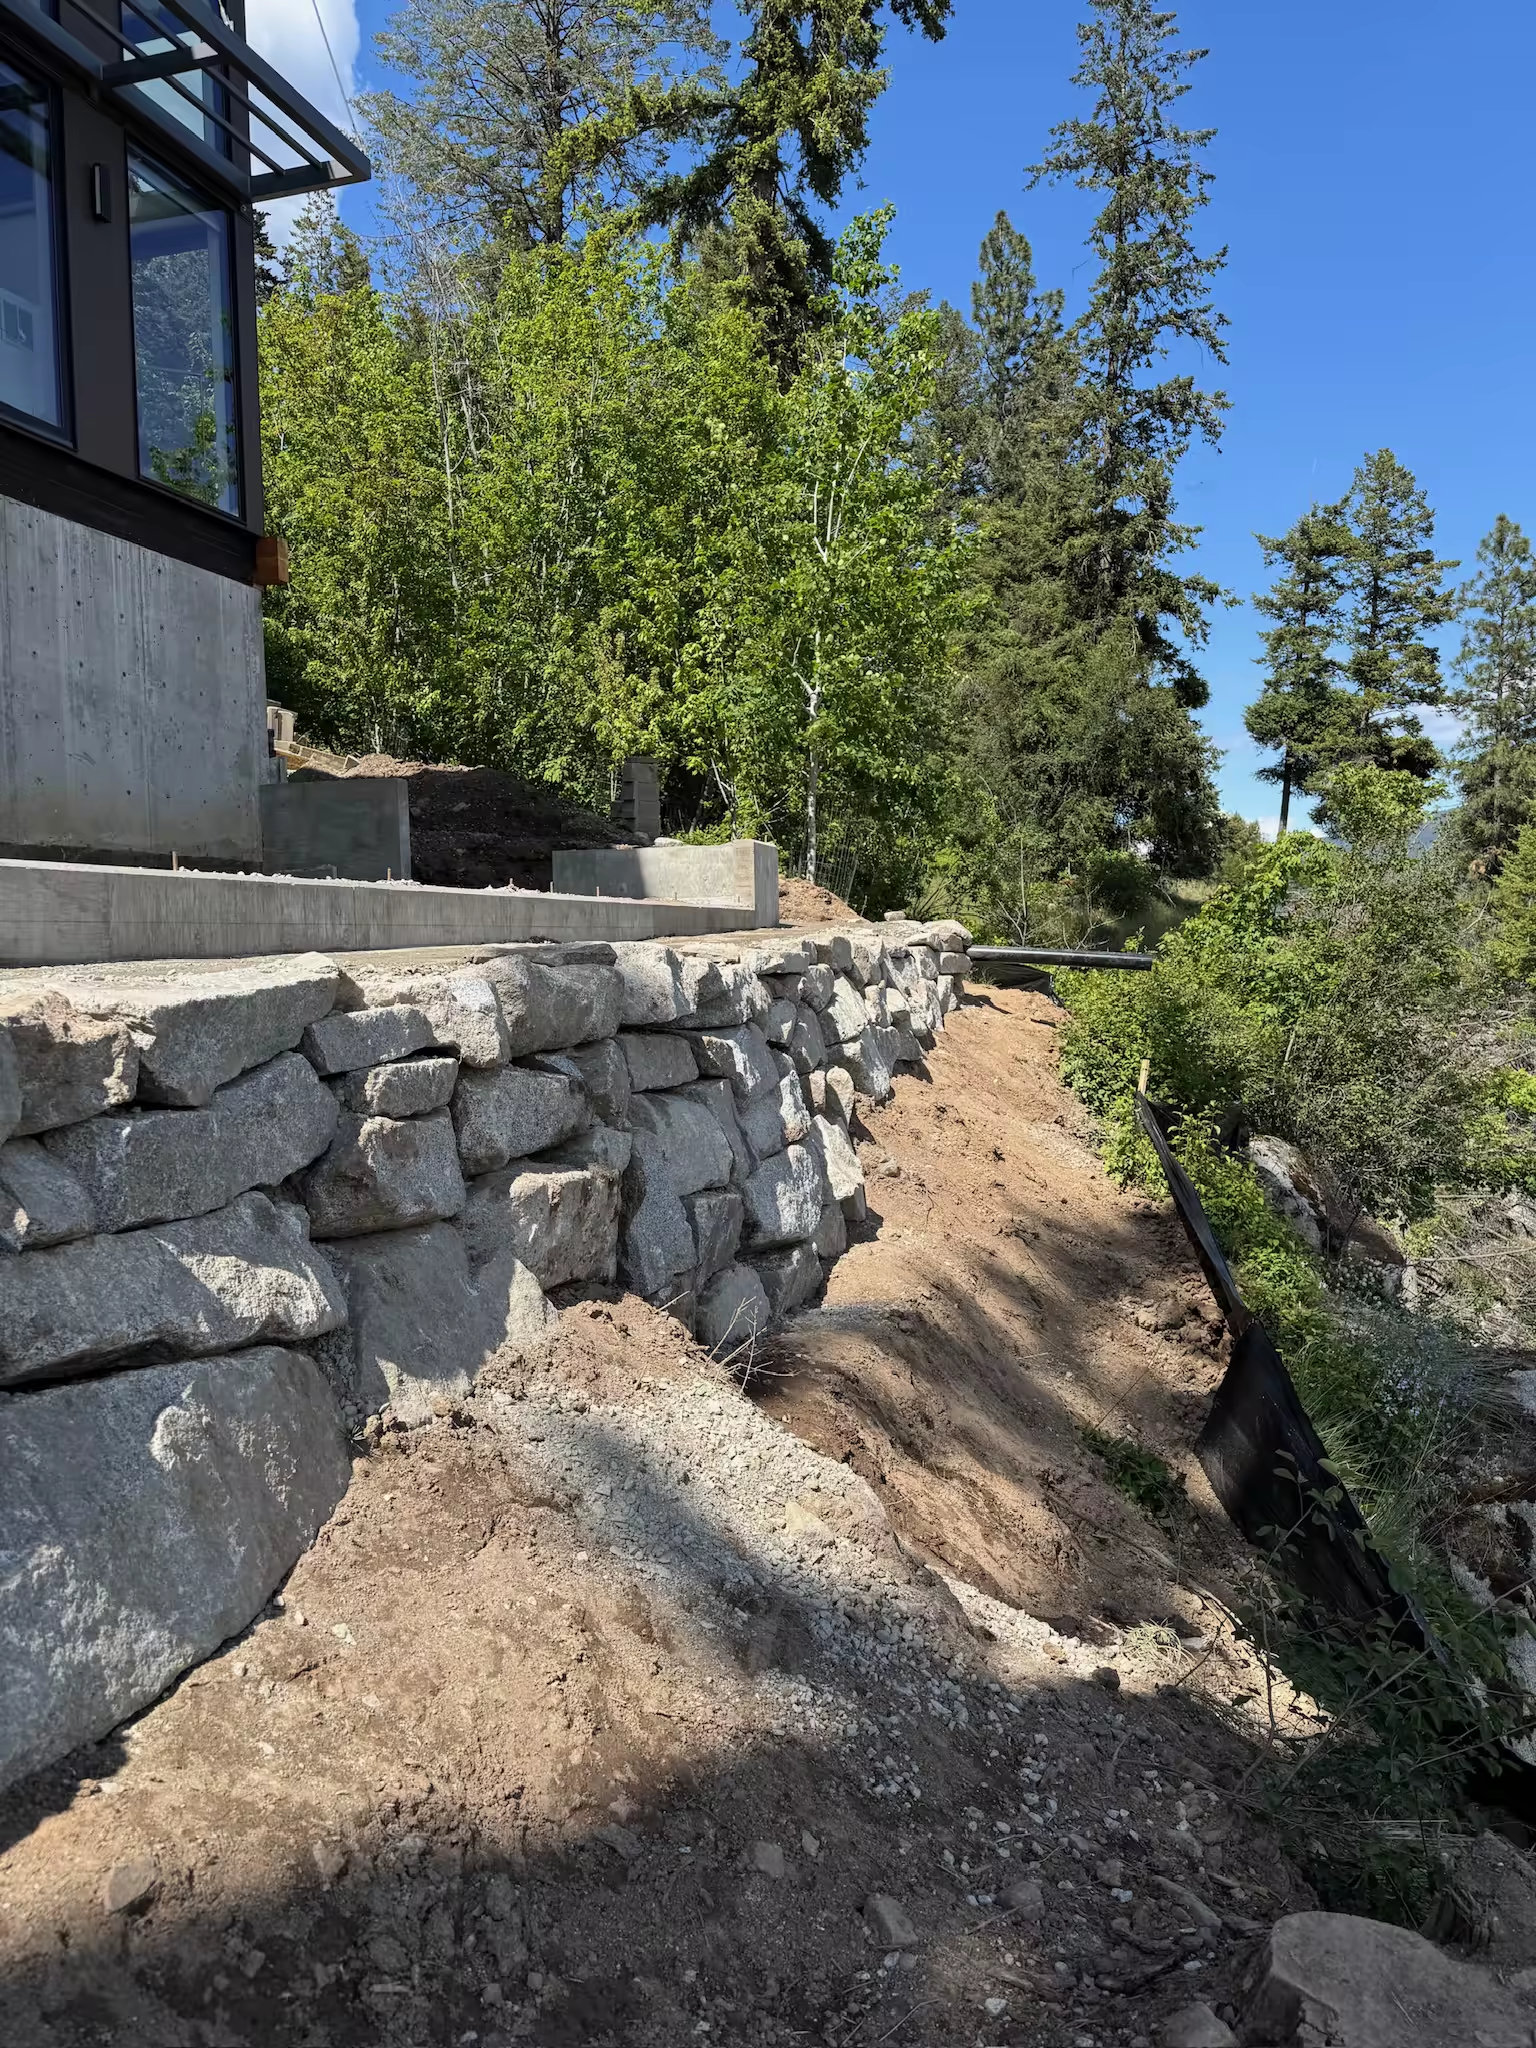
We started at the far end and worked back toward the exit so completed sections would not have to be crossed again. The tilt rotator allowed us to work from above the wall, reach out over the slope, and rotate individual boulders into position without repeatedly moving the excavator.
The skid steer carried boulders and other material from the roadside staging area down to the work zone as construction progressed.
- ◆Built from the far end out so the crew and equipment could work back toward the property’s only access point.
- ◆Placed and rotated boulders with the tilt rotator, giving the operator more control in the narrow space and along the steep slope.
- ◆Moved material from the road with the skid steer, carrying boulders and gravel down to the work area as they were needed.


Backfill, Cleanup, and Project Completion
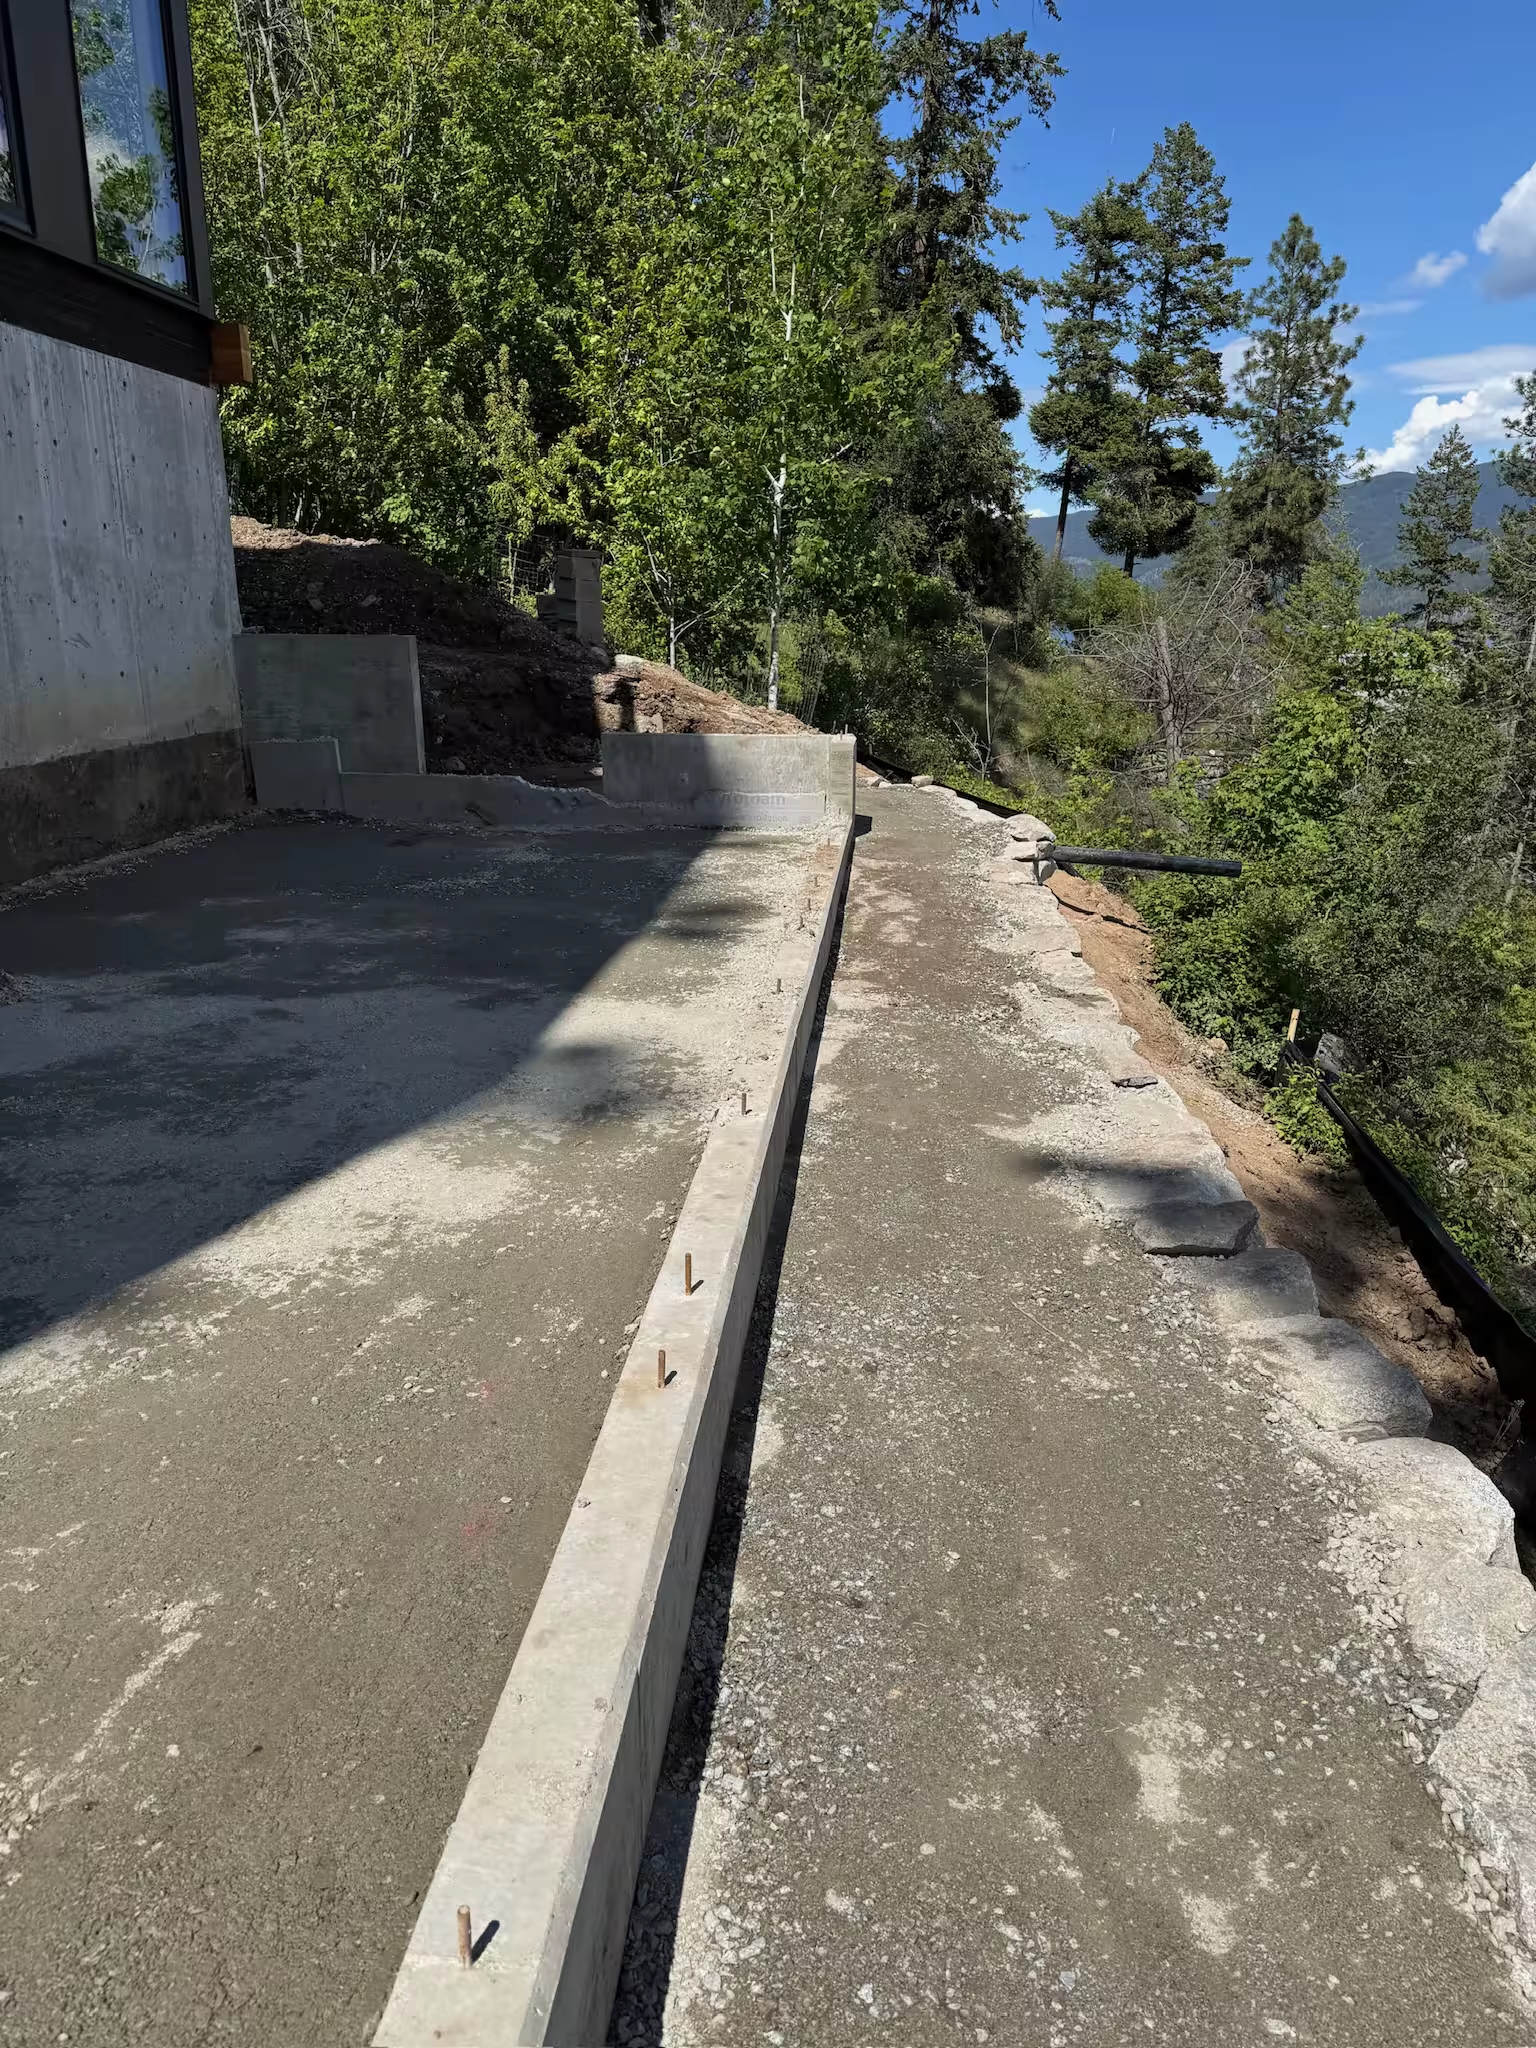
As the wall was built, we backfilled behind it and placed the remaining gravel base as we worked toward the access point. Working this way allowed us to finish each section as we moved toward the access point rather than driving back across completed work later.
Once we reached the end of the site, the temporary access-ramp material was cleaned up and the excess material was hauled away.
- ◆Backfilled behind the wall as construction progressed, completing each section before moving toward the access point.
- ◆Finished the interior base with the gravel needed to leave the addition prepared for the concrete work that would follow.
- ◆Removed temporary access material and hauled out the remaining excess material as the crew worked its way off the site.
The Finished Result
By the end of the project, the interior was prepared for the future concrete slab, the retaining wall was built and backfilled, and the temporary access material had been cleaned up and hauled away.
The job ended up requiring more excavation and material than originally planned, largely because of the unsuitable soils and increased wall height. The general contractor was pleased with the completed work and later brought us in for another, larger project across town.



Questions About This Project
If you’re planning excavation, retaining work, or site preparation on a steep or difficult property, you may have questions about access, materials, wall construction, and project timing. Here are answers to some of the questions we hear most often.
Why did the retaining wall need to be taller than originally planned?
The wall was originally estimated at roughly 2 feet high.
Once excavation started, we needed to go deeper to reach suitable material for the wall base. Combined with the steep slope below the addition, that increased portions of the wall to approximately 4 to 5 feet.
Why was the material beneath the future slab replaced?
The condition of the material could not be fully evaluated during the initial site visit because another contractor had already excavated the foundation.
Once we began working inside the foundation, we found that the existing material was not suitable for the slab base. It was removed and replaced with new material before the interior was brought to grade.
How did you get equipment and material behind the house?
Materials were staged along the road on the opposite side of the house.
We widened the existing access path and reduced the slope to create a route down to the work area. A skid steer was then used to carry gravel, boulders, and other material from the staging area to the addition.
Why was the retaining wall moved farther from the foundation?
During the project, the homeowner decided they wanted a walking path along the outside of the addition.
The wall location was pushed out a couple of additional feet to provide room for that path.
How did the tilt rotator help on this project?
The 12-by-80-foot work area provided very little room to reposition the excavator.
The tilt rotator allowed the operator to reach around tight corners, work from different angles, and rotate boulders into position while keeping machine movement to a minimum.
How long did the project take?
We spent about one week on site.
The work took somewhat longer than originally planned because unsuitable material beneath the slab had to be removed and replaced, and the retaining wall required additional excavation and height.
Need Retaining Work on a Steep North Idaho Property?
Tight access, steep grades, and changing ground conditions can have a major impact on how retaining work gets built.
Tell us where the property is, what you're trying to build or support, and what the site looks like. We'll take a look at the details and determine what the work will require.